Tuesday, January 25, 2011

Bring a liitle bit of the Orient to your landscape.

The Japanese Maple is one of the most beautiful and interesting small ornamental trees available in our area.
It has spectacular fall color and some varieties can have that color throughout the growing season. Regardless of the color the foliage and shape of the trees is one of the most interesting aspects of its look.
Pictures just can do Justice to the overall feel of this plant.

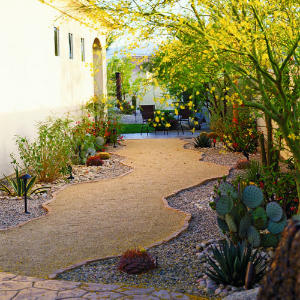
If you a protected, part shade or full shade area in your landscape then you have a great opportunity to add one of these remarkable specimens. These are actually understory trees that will need protection from the mid-summer heat in our area. Other than they adapt well to our soils and thrive if placed in the right spot.
There are many varieties of Japanese Maples and they come in many different shapes, sizes and colors.


A selection of notable or popular cultivars, with brief notes about characteristics that apply during at least one season, includes the following.
  • 'Aka shigitatsu sawa', pinkish-white leaves with green veins
  • 'Ao ba jo'—a dwarf with bronze-green summer foliage
  • 'Atropurpureum'—wine-red, including new branches
  • 'Bloodgood'—an improved cultivar of 'Atropurpureum'
  • 'Butterfly'—small leaves with white borders
  • 'Dissectum'—lace-like leaves, drooping habit
  • 'Golden Pond'—greenish-yellow summer foliage
  • 'Goshiki koto hime'—a delicate, variegated dwarf
  • 'Higasa yama'—crinkled leaves variegated with yellow
  • 'Hupp's Dwarf'—a small, dense shrub with miniature leaves
  • 'Issai nishiki kawazu'—very rough, rigid bark
  • 'Kagiri nishiki'—similar to 'Butterfly' but more pinkish tones
  • 'Karasu gawa'—slow-growing variegate with brilliant pink and white
  • 'Katsura'—yellow-green leaves tipped with orange
  • 'Koto no ito'—light green, thread-like leaves
  • 'Little Princess'—a sparsely-branched dwarf with irregular habit
  • 'Mama'—a bushy dwarf with extremely variable foliage
  • 'Masu murasaki'—a shrubby tree with purple leaves
  • 'Mizu kuguri'—orange-tinted new growth and very wide habit
  • 'Nishiki gawa'—pinetree-like bark desirable for bonsai
  • 'Nomura nishiki'—dark purple, lace-like leaves
  • 'Ojishi'—tiny dwarf, grows only a few centimetres per year
  • 'Osakazuki'—tree-like shrub with spectacular autumn colour
  • 'Peaches and Cream'—similar to 'Aka shigitatsu sawa'
  • 'Pink Filigree'—finely dissected, brownish-pink leaves
  • 'Red Filigree Lace'—delicate, finely dissected, dark purple
  • 'Sango kaku'—"coralbark maple" with pinkish-red bark
  • 'Seiryu'—a green, tree-like shrub with finely dissected leaves
  • 'Shikage ori nishiki'—vase-shaped shrub with dull purple foliage
  • 'Skeeter's Broom'—derived from a 'Bloodgood' witch's broom
  • 'Tamukeyama'—finely dissected, dark purple, cascading habit
  • 'Tropenburg'—slender, upright grower, convex lobes, purple leaves
  • 'Tsuma gaki'—yellow leaves with reddish-purple borders
  • 'Yuba e'—upright tree with scarlet variegation


If you have the right spot to plant one, then by all means go shopping, pick out the one for you and enjoy the peaceful, easy feeling this tree can bring to your outdoor space.


Friday, January 21, 2011

The spaces we design profoundly effect peoples lives.

I recently received a testimonial from a client that really brings home the fact that what I do has a very personal impact on those I serve. Designing spaces where people live is as important as any other discipline in life.


Here the testimonial:

" What I think of with CGreen is the emotional connection with me and my feelings about my home, my environment, my place to reflect myself, to host others and to nest with my family. Cgreen brings that to life with expertise and service that I see (Landscape & Stonework) and what I don't see but rely on (Irrigation & Drainage). An enjoyable experience that provides an extraordinary environment."


It is so exciting to here about our effect on the lives of our clients.
It is also very humbling.

I sincerely hope and believe that it is my duty to add to the quality of life of each and every one of my clients.

I believe that I am not here to enrich myself, but to enrich the lives of others.

Not bragging, just sharing, which is what this blog is about.

Thursday, January 20, 2011

Do you have water under your house?

If you have problem with water in the craw space of your foundation, or you have water infiltration through the bottom of your slab foundation, then a French drain is the most likely solution.

The most likely cause of the water penetration is through sub-surface water movement (Water Moving Below Ground). Barring the existence of a natural spring, this generally happens when surface water ponds or stands on the ground surface with no place to go. It will then "Soak In" and begin to travel below ground. The interesting thing is that through capillary action this water moving below ground can defy gravity and flow up to the surface. For many an unfortunate homeowner this happens under their per and beam foundation or in their sunken living room and even under their wood floors. If your house is on a pier and beam foundation and you have this musty oder that you just can't get rid of, water in the crawl space could be causing mildew and rotting under the house. Are your wood floors warping and becoming unlevel and unsightly, could be moisture from below.

French Drain Illustration
 If the water can't be caught at the surface before it travels below ground (which is often impractical), then the best solution is probably a French drain, sometimes called a curtain drain, which will create a barrier that will catch this subsurface water before it moves under the house. It is imperative that the bottom of the French drain system, where the perforated pipe is located, is below the footer or grade beam of the foundation. Preferably at least 6" below. It is necessary to maintain slope on the bottom of the French drain toward the discharge point. The drain may start out at 2.5 ft. deep, but by the time it gets to the end of the foundation it may be 3.5' deep. Many times a sump pump and pit will be necessary as a result of the required depth of the drain pipe.
 
Typical French Drain Plan
Hopefully the Illustration will help in understanding how the system works. Note that the shallowest point is at the upper right corner and the French drain is sloped so that the water will through the perforated pipe to the sump pit, where it is pumped uphill, out to the street.
There are many more applications for French drains, and there more components that can be added to the French system for those different applications, but for now, this is a simple system that can solve a terrible problem. I have seen many flooded crawl spaces and wet sunken living rooms that have been completely dried out with this system.

Wednesday, January 19, 2011

More on Drainage

Atrium Grate
To prevent clogging
There is a basic protocol when it comes to residential drainage drainage correction.

1. Correct the issue by re-grading. In other words re-shape the ground to direct the flow of water away from the house and off the property. Preferably into the street, alley or drainage easement and not into the
neighbor's yard.

2. If re-grading alone will not work then the use of surface drains is the next step. There must still always be some slope away from the house. If when creating that slope a new low spot is formed where water will
pond, it may be necessary ti install a surface drain. This is a drain grate attached to a catch basin which collects water as it flows across the surface of the ground. This surface drain is connected to a pipe which then carries that water (driven by gravity) down hill to a predetermined discharge point. Many times at the bottom of a curb or into an alley.

3. If the property to be drained is so flat that there is no "Down Hill" to drain water to, or even worse, the    
    house is completely surrounded by higher ground, it may become necessary to pump the water out to the
    street or alley. The ground should still be re-graded to provide slope away from the house and to direct
    water to the location of catch basins. The pipe that the catch basins are connected to will then lead to a  
    pre-manufactured pit that is dug in at least 4' in the ground and is at least18" in diameter. A sump pump is
    placed in the bottom of this pit. the sump pump is typically operated by a float switch. As the water level in
   the pit rises it will activate the float switch. The last stage in this system is the discharge pipe which is
   installed from the pump to the street or alley. The discharge pipe is almost always going up hill, but that's 
   OK,  that's why there is a pump.

In summary the first way to  solve a drainage problem at a typical residence is to try #1, if that will not work then try #2, and lastly if #2 will not work then use the last protocol. Water goes downhill, if you do not have a down hill then the only way to get it up hill is to pump it.

A Typical Surface Drain

Bottom of Curb Discharge
Down spout adapter collects water directly
from the gutter and puts it into the drainage system
If you have problems with water below your foundation and in the crawl space of a pier and beam foundation then stay tuned for the next drainage blog where French drains and subsurface water will be explored.

Thursday, January 13, 2011

Information on Lawn Drainage

How to Identify and Correct Lawn Drainage Problems
It rained last week. Your lawn still has very large puddles of water, and they are not going away, even though it stopped raining a couple of days ago. The neighborhood kids love to play in it, which is as natural as the rain itself, but your lawn clearly has drainage issues. A flooded lawn is an unhealthy lawn and should be a concern to the homeowner.
Why is water laying on the grass for any period of time a bad thing? Aside from being a prime breeding ground for mosquitoes, excessive water laying on the surface will eventually weaken and kill the grass. Grass roots need air to survive and maintain healthy growth, and that unnecessary damage can be prevented if lawn drainage issues are identified and corrected. .
To identify the source of the drainage problem, look for these conditions:
Roof leaders or down spouts that direct rainwater on to the lawn.
Surface grading that is sloped toward a walkway or house foundation. The impermeable surface of a walkway or foundation acts as a dam, preventing any flow in that direction.
Adjacent properties that have been raised, draining water to surrounding lower areas, including your lawn.
Very flat grading that has no perimeter swale* to drain water. If the surface is absolutely flat with no drainage, water has no slope or direction to drain and will remain static.
* a swale is a very shallow ditch with gently sloping sides.
Poor quality grading that has major depressions in the center. Water always collects in the lowest areas.
Hardpan subsoil. Hard clays and hardpan are impermeable to water and prevent surface water from percolating into the ground. Hardpan soils can be as little as a few inches thick, or many feet thick.
All conditions must be collectively identified prior to taking remedial action.
Once you have determined why water remains on the grass, the source of the problem can be addressed and solved. Here are a few thoughts on solving drainage issues.
Roof leaders, gutters and down spouts:
Roofs can collect a very large amount of water which must be directed away from the foundation of the building. Most down spouts have a little bend at the bottom end, which merely shoots the water a foot or two away from the wall, but it also directs the water onto the nearest lawn if there is inadequate drainage. Extend the down spout to direct water to a swale.
*Note that in most jurisdictions, it is illegal to connect roof leaders to the sanitary sewage system, which overloads sewage treatment plants and control systems.
Surface Grading
1. Surface grading should always be away from the foundation of buildings to prevent damage to walls. Check grading and fill and raise the elevation at the wall if it is too low. Grading should slope a minimum of 4' away from the foundation.
2. If water is collecting along a walkway, or foundation, consider correcting the grade just enough to allow the water to drain away from any foundation, and allow drainage from one end.
3. If your lawn surface is lower than an adjacent property and collecting water from that property, consider top-dressing your lawn, raising it to the same elevation.
As an aside, avoid any confrontational initiation of a "tit-for-tat" "lawn-raising competition. Instead, allow for a drainage swale between the properties. In this instance, a good drainage swale creates good neighbor relations.
Perhaps raising your lawn is not even necessary. Excavate shallow swales along the perimeter if adequate slope for drainage of the swale itself can be made available in doing so. An effective, properly constructed swale may be almost invisible, as it is contoured carefully and gently enough to be treated as any other section of grass. Above all, be careful not to create new drainage problems when adding more topsoil.
4. Correct any depressions in the surface of your lawn. Use a tightly-stretched line and small pickets to identify low areas. Fill the depressions with topsoil, roll to compact the soil, and re-seed or re-sod the grass. Most grading, if done correctly, will solve drainage issues.
5. If there is no other drainage available, consider installing surface drains and/or French drains. “Tune In” tomorrow to see “How to Install Surface Drains and French Drains.”
6. As a last resort, if there is no drainage pattern available, turn the excess water into a benefit. Excavate for a small pond, place a liner in it, add decorative cobbles, rocks, aquatic plants, a fountain, pump, and a filter to keep the water fresh, and turn it into a beautiful landscaping feature. Correct the balance of the drainage area to keep the surrounding lawn dry, lush, and healthy.
Now that you know how to solve lawn drainage issues, you will no longer need rubber boots to cut the grass.

Wednesday, January 12, 2011

It may be cold now, but you will want to beat the heat this summer.

What better way than to incorporate an arbor into your outdoor environment.


There are many possibilities when designing a shade structure. It can have a solid roof that will create a space sheltered from the rain.  
You can even build one on a roof.
  

A slatted roof will allow natural light into the space and bring more of the outdoors in.

Arbors are great structures to help create spaces for outdoor entertainment.
They can come complete with ceiling fans, TV's, refrigerators and bars. These structures are custom designed and built for your space to help create a unique outdoor environment.

Contact Cgreen today to begin the process of creating a master landscape plan that can incorporate structures, hardscape, water features and planting plans to provide spectacular spaces for you, your family and friends to enjoy this upcoming summer.

Mark Taylor
Cgreen
We design, build and maintain your outdoor dreams.

Tuesday, January 11, 2011

Stop Crape Murder!

Its the time of the year to prune Crape Myrtles, but lets not get carried away.
Take a look at the following article before you grab those shears.

Pruning
Bram Franklin and Neil Sperry, Board Members, The Crape Myrtle Trails of McKinney
A great percentage of the pruning done to crape myrtles annually is either unneeded or done incorrectly.  What has taken Nature years to produce, we can ruin in mere minutes through improper pruning.

Pruning Facts to Know Before You Start:
  • Always prune with a purpose.  Know exactly where and why you are making each cut on your crape myrtle.
  • Never use pruning as a means of height control for crape myrtles.  It is never proper "to prune standard crape myrtles back."  In other words, never "top" any large crape myrtle at any time for any purported reason. 
  • All crape myrtles are, by their nature, shrubs. As landscapers taught us beginning in the 1950s and early 1960s, we can remove lower branches of taller types so that they will look like small trees. However, they will continue to send up sprouts around their bases.  If you do not remove those sprouts as they develop, your plant will revert to growing shrub-form.
  • Crape myrtles flower on new growth.  That is counter to most other flowering shrubs that produce their buds and blooms on the prior year's growth.
  • You can often stimulate additional new growth and second, third and even fourth rounds of flowering by removing spent flower heads as soon as the last petals have fallen. Allowing them to go to seed will slow or halt further flowering for that growing season.
  • You can remove old, dried seed heads during the winter if you wish, but it is only cosmetic.  Crape myrtle branches will always die back by 6 to 8 inches each winter.  Even if you do not remove the seedpods, the new growth will begin at the bases of the dead twigs. That new growth will quickly overtake the parts that have died back.
Time to Prune
It is easiest to prune crape myrtles during the winter while they are completely dormant.  That's the best time to see their branching structure, so that's the best time to identify and remove limbs that are damaged or that are beginning to rub against one another. However, you can actually prune crape myrtles to remove unwanted branches and basal sprouts year 'round.

Pruning Tools

You will need a pair of bypass hand shears, a pair of long-handled lopping shears and a small pruning saw.  You will probably occasionally also want a long-handled pole pruner to reach high into tree-form crape myrtles.  Take care of your pruning tools, keeping them clean, sharp and well-oiled. Store them in a dry location when you're not using them.

Pruning Techniques

Make each cut flush with another branch or with the main trunk.  Never leave stubs larger than a pencil-width in diameter when cutting any part of a crape myrtle.  That rule alone will prevent topping of crape myrtles, known by many as "crape murder."  It is singly the worst and most threatening practice in routine crape myrtle maintenance.
 
Prune above buds and twigs that face out from the center of your crape myrtle.  Those will be the new shoots that will develop.  Your goal is to encourage open and spreading growth so that limbs won't rub together, also so that air movement will not be impaired to the centers of the plants.  Powdery mildew is a threat to crape myrtles, and overly dense canopies encourage its development.
 
If you are trying to train a somewhat mature shrub-form crape myrtle into a tree shape, determine first which of the trunks will become the structural trunks of the new tree, then prune and remove all the rest completely to the ground.  You will want 3 or more trunks, and odd numbers of stems are visually more appealing.  They will try to resprout the following spring, but just keep them pruned away.


It may seem extreme, but, if you have a tall crape myrtle that has been topped, the quickest way to get a great-looking plant back again will be to cut the trunks completely back to the ground.  You will be absolutely amazed at how quickly they can regrow into straight, new trunks.  Usually you can have a fairly mature-looking plant within 12 to 24 months. That's far quicker than trying to coax new branches to conceal the effects of a prior topping.

Research has shown that pruning sealant can actually slow the healing of cut branches.  It is usually best not to apply it to crape myrtles as you trim them.
 
The Crape Myrtle Trails of McKinney strongly encourages you to ask plenty of questions before you prune (and possibly ruin) your crape myrtles. Your local nurseryman or Extension agent can also help.


Crape myrtles in Tennessee were dealt a devastating blow when a hard freeze on April 9 caught them leafed out and starting to grow.  Stem tissues froze and cracked from the abrupt changes.  Ice crystals soon formed in the frothy sap and in the moisture that accumulated within the cracks.  The only recourse was to cut the frozen plants completely to the ground immediately, then retrain any new shoots into the plants' former forms.  For the record, this type of damage is not confined only to crape myrtles.  Even light freezes that occur after plants are growing actively can kill tissues that normally would withstand winter temperatures 25 or 35 degrees colder.  This was a fluke that hopefully will not be repeated anytime soon.


<><><><>
<>
<><><><>


Unusual Freeze Damage from Tennessee
 

A Special Exception in Crape Myrtle Pruning:  The following advice may seem contradictory in pruning crape myrtles.  Dwarf crape myrtles (those that stay 4 to 5 feet or shorter at maturity) can get rather lanky when allowed to grow to full height.  Since you will never be developing them as trees, you may want to keep them as short and compact as you can.  Not unlike the woody perennial butterfly bush, dwarf crape myrtles can be cut to within 10 to 15 inches of the ground each winter, almost like leggy perennials.  They will regrow vigorously in the spring and begin blooming on their new growth by summer. However, extreme pruning of this nature must be used only for the very short varieties, and only when they tend to grow gangly without it.

Pruning Sealant
Tree-form crape myrtles have been developed from what were genetically shrubs.
As your young crape myrtle tree begins to take its shape, gradually remove side branches so that the trunks become more visible.  At any given time you will not want to remove side branches more than half-way up the trunks. They are important in the plants' overall vigor, so leave them in place as long as you can. This pruning can be done at any time and it's known by commercial growers as "trashy trunk," where the shoot stubble is left on the trunks to help them thicken.
 
You may want to develop single-trunk crape myrtle trees, known commercially as "standards."  The process is exactly the same, except you choose the single straightest, best trunk and encourage it to develop.  You will need a stout stake alongside it to keep it bolt-upright as it grows.  It is considerably more challenging to produce standard crape myrtle trees than it is those with several trunks. You must also be careful to keep their tops well-balanced in ensuing years so that they don't begin to lean and lose their symmetry.
 
Mature, established crape myrtles do not require annual pruning.  However, you may want to thin the internal branching.  Crape myrtles can become very dense with several branches vying for the same space and sunlight. Thinning opens the plant's canopy up, but it does not change the plant's overall profile when viewed from the side. It allows you to remove rubbing branches before they are both ruined.
 
Restoring a Topped Crape Myrtle
"Topping" crape myrtles is always a bad plan.


It may seem extreme, but, if you have a tall crape myrtle that has been topped, the quickest way to get a great-looking plant back again will be to cut the trunks completely back to the ground.  You will be absolutely amazed at how quickly they can regrow into straight, new trunks.  Usually you can have a fairly mature-looking plant within 12 to 24 months. That's far quicker than trying to coax new branches to conceal the effects of a prior topping.

Monday, January 10, 2011

Camellia Japonica - The Rose of Winter

The Japanese Camellia is one of the best known species of the Theaceae family, or Tea family. Camellia Sinensis is the plant that Tea comes from, but do not run out into your garden and gather your Camellia leaves for tea, this is just a slightly different plant.
This is a flowering shrub or small tree native to China, Korea and Japan. It is also the official state flower of Alabama.


In its natural habitats the wild plant will grow 20' - 30' tall and usually has red flowers 2" - 3" in diameter.
There are now over 2000 hybrids and cultivars with flower color ranging from white, pink, red and some rare varieties with yellow. Camellia Japonica "Alba Plena" is one of the most beautiful and once prized of all the Camellias. It was brought to England from China in 1792 by the East India trading company. The flowers are pure white and 3" - 4" across. It blooms earlier than most camellias, in early winter and spring, and can flower 4 to 5 months.
These Roses of winter should be planted in shade. They require an acidic, well drained soil. In our clay soils of the metroplex that means plant them like Azaleas, preferably in a raised bed with alternating layers of sand and sphagnum peat moss and some gravel at the bottom.

Friday, January 7, 2011

Nothing can make your landscape "Pop" like annual flowers.


 Annual flowers can provide landscaped areas with more seasonal variety and colorful accents than most other plants. The key to success with annuals is to plant only the area that can be adequately cared for. Remember, color can have more impact on the landscape than any other design element. However, nothing has a more negative impact than a poorly maintained color area.
 Soil preparation is perhaps the most important aspect in maintaining seasonal color areas. This begins with the addition of large quantities of organic matter to obtain optimum aeration, drainage and water holding characteristics. Generally speaking, beds should consist of at least 50% organic matter for best results. In addition, bed areas should be raised to a minimum of 4-6 inches to avoid "drowning" during wet, rainy weather. Since organic matter can be difficult to re-wet after excessive drying, a wetting agent can be used to achieve uniform water distribution throughout the soil.

Then just before or immediately after planting, apply a pre-emergent herbicide labeled for ornamental use, such as Treflan, and leave it undisturbed on the surface.
Fertilizer should also be incorporated into new beds. Select one where the ratio of N-P-K is 1:1:1 or 1:2:1 and apply according to label directions. Normal rate of application on new beds is generally 1 to 2 pounds per 100 square feet. On established beds, a soil test is recommended; normally, 1 pound per 100 square feet would be sufficient. Spade, rototill or otherwise mix well until uniform and level off.


Wait...don't try to jump the gun on planting! Most spring annuals can't be planted until after the danger of killing frost has passed; refer to the chart on hardiness for more details. Many warm season plants, such as periwinkles and caladiums, can not tolerate cool soil temperature. Delay planting until the medium reaches 70 degrees.

Many annuals, chiefly begonias, impatiens, coleus, alyssum, ageratum, lobelia, vinca, salvia and others, require little additional care. Their flowers fall cleanly from the plant after fading and do not need to be manually removed.
Others, such as marigolds, geraniums, zinnias, calendula and dahlias will need to have faded flowers removed. This is known as "deadheading" and not only keeps plants attractive but also discourages disease and keeps plants from going to seed so the plants will produce more flowers and look tidier. Deadheading can be done with pruning shears or sometimes with the fing
In most of Texas and the southwest, color areas can be changed out 2-3 times per year. Spring planted annuals are usually set out from late February through the first of June. A second planting of heat tolerant annuals, such as verbena, periwinkle or portulaca, is frequently used from June through the hot summer months. Fall planted annuals, like pansies and dianthus, are nerally set out when temperatures begin to cool off in late September-October. Managing color change outs is an important part of keeping plant materials looking their best.

Selecting a well adapted variety is the most critical element for success with seasonal color in the landscape. There are literally hundreds of varieties available but few will thrive in our stressful environment.
An excellent way to create more economical and sustainable color beds is to combine the annual flowers with flowering perennials. If designed properly, there will be year round "Action" and a reduced amount of seasonal planting.
For more information on the best ways to create more colorful impact in your landscape contact me at Cgreen.

Taken in part from the Texas A&M Horticultural Extension Website.

Mark Taylor
Cgreen Landscape and Irrigation
Building and maintaining your outdoor dreams.

Thursday, January 6, 2011

Decomposed Granite.....A Natural and Versatile Material


If you have never heard of decomposed granite before, here is a short explanation. The color of decomposed granite is reddish-brown. It begins in the form of granite rock and then decomposes into a smaller form or gravel. This form of gravel contains high levels of trace minerals. It can be made in many different sizes and is purely safe for the environment.
Decomposed granite can be used in different ways, even mixed with other substances. It is commonly used for sidewalks, gardens, pathways, patios, trails, playing fields, golf courses and any area where stone or aggregates can be used. You can also make decomposed granite driveways.


Decomposed granite is made of very small pieces of granite. The sizes can range from a maximum of 1/4" to a sandy consistency. It is a fairly fine mixture, as opposed to other materials.
DG can be used in a few different ways. How long it will last and the cost depends on which application is used for the project.
Decomposed granite can be used as singular material to create decks, driveways, and pathways. Decomposed granite can also be used in conjunction with other materials, such as flagstone, to economically create naturalistic hardscapes in your outdoor environment.


Decomposed Granite Selection

1.                 Choose decomposed granite for your project based on what you want the surface to look like. Decomposed granite selection ranges from ¼-inch pieces to pieces no bigger than grains of sand. The larger pieces can provide more surface texture to your pathway or drive where smaller pieces provide a smooth surface.

Pick the granite color best suited to your landscape and house colors. Just as granite counter tops come in a variety of colors, the small granite chips of decomposed granite come in similar color ranges. There are many shades of blues, greens, yellows and reds as well as natural stone colors. It is possible to use one color of decomposed granite for the main portion of the path and use a separate color as edging or accent.

You also need to decide how you plan to stabilize the decomposed granite. You can just pack the granite pieces tightly on the ground for a loose path or drive. Stabilizers are another option. These allow you to create a path that can last up to ten years and come already added to the granite. Adding resins to the decomposed granite allows you to set your driveway in place for up to fourteen years with a minimum of maintenance.


Decomposed Granite Preparation

2.                 Decomposed granite needs a solid bed to lie on. Preparation of the subsurface is important to the success of this project. Depending on whether this is a pathway or a driveway, you need to put down a bed of crushed rock. For a pathway, the rock needs to be at least four inches thick and a driveway needs a base at least six inches thick.

Before you lay the crushed rock, decide if you want the finished path or drive to be level with the ground's surface. If you do, you need to dig out enough dirt to allow that.

Put the crushed rock in place and wet it down. Run a compactor over the base to settle all the fine rocks into place and to provide a hard surface for the decomposed granite.

Decomposed Granite Installation

3.                 Place the decomposed granite over the crushed rock. Level it as much as you can by hand. Use a hose to water the decomposed granite down. This helps plain decomposed granite set up. The water activates the stabilizer or resin if you chose that type of application. Follow directions from your granite supplier for the proper amount of water to apply.

Once you can walk on the decomposed granite without sinking in or feeling muddy underfoot, use a roller to pack it down. Make several passes to ensure that the surface is smooth and has no marks from the roller.

Allow the decomposed granite to dry. Look for signs of chipping or cracking. You can repair problems with the addition of more water and decomposed granite. While the finished surface is solid, it's normal to hear the crunch of the rock in the sublayer.

      Contact me today for more information on how you can have a new decomposed granite deck, pathway or driveway in your landscape.

       Mark Taylor
       Cgreen Landscape and Irrigation
       We design, build and maintain your outdoor dreams.

Wednesday, January 5, 2011

Drainage Issues?......Ya Think!

Cgreen is an outdoor environment company.
That means we evaluate many different aspects of that environment as we plan your space.
Does your landscape company?
The above photo illustrates one of those critical aspects - drainage.

                                  With proper planning and with the right expertise Cgreen can anticipate and correct drainage issues on the properties we improve.In fact many realtors and property managers depend on Cgreen to evaluate proerties for drainage problems and to design and implement solutions to those problems. With Cgreen when we are done, nothing is left undone.

Tuesday, January 4, 2011

Love Maples, check this out.

Shantung Maple

Scientific Name: Acer truncatum

The Shantung Maple is a midsize ornamental tree that is great for small yards and it tolerates alkaline soils, drought, and strong wind. The Shantung Maple steps up to autumn with leaves that are gorgeous golden yellow flecked with red before they launch into orange. The Shantung Maple differentiates from other maples (Red Maple and Silver Maple) in that the canopy is denser and the leaves are more delicate, which is reminiscent of a Japanese maple but with much greater toughness (tolerates full sun). The Shantung Maple is designated as a Texas Superstar Tree by Texas A&M University.

Want a Japanese Maple but you don't have a protected area in your landscape. This is a great alternative. The Shantung will take the full sun in Dallas and can an excellant estate tree for a small yard.

This information taken, in part, from other sources.

Monday, January 3, 2011

When the walls come tumbling down!

This wall was designed and specifications drawn up by a professional engineer. The design would have stood tall if the contractor had actually built it according to the engineered specifications. The best plans and specs are worthless if they are not followed by those that actually build. This is a prime example of the many possible consequences of of going with the
"Low Bidder".
Cgreen will never be the "Low Bidder", but then again, this picture is not of Cgreen work.